Once you’ve installed and activated the XISE Image Search plugin, you can configure it directly from your WooCommerce settings.
Accessing the XISE Settings #
Log in to your WordPress Admin Dashboard.
Go to WooCommerce → Settings.
Click on the XISE tab in the top menu.
You will see 3 sub-sections:
Search – General image search configuration.
Result – Control how search results are displayed.
AI – Configure Google Vision API integration.
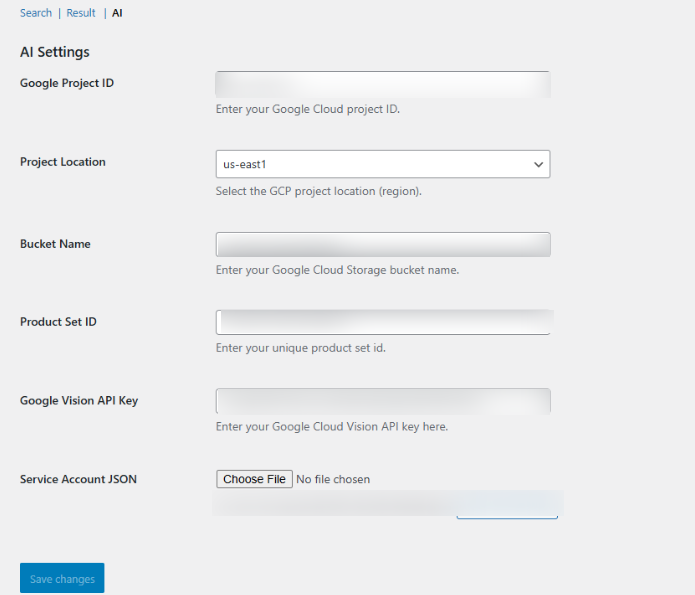
AI Settings #
These settings are critical for connecting your WooCommerce store to Google’s AI services. You will need to provide information from your Google Cloud project. For detailed instructions on how to obtain these values, please refer to the “WooCommerce AI Search Settings Guide” document. This is the minimum settings you need before you can index your images.
Google Project ID: Your unique identifier for your Google Cloud Project.
Project Location: The geographic region where your Google Cloud project is located (e.g.,
us-east1,europe-west1). This should match the location of your GCS bucket.Bucket Name: The globally unique name of your Google Cloud Storage bucket where your product images will be stored.
Product Set ID: A unique ID for the product set you have created within the Google Vision AI Product Search service.
Google Vision API Key: API key for authentication as set in Google Cloud vision.
Service Account JSON: You can upload the JSON key file that you downloaded from Google Cloud. The plugin will display the name of the current file and provide a button to clear it.
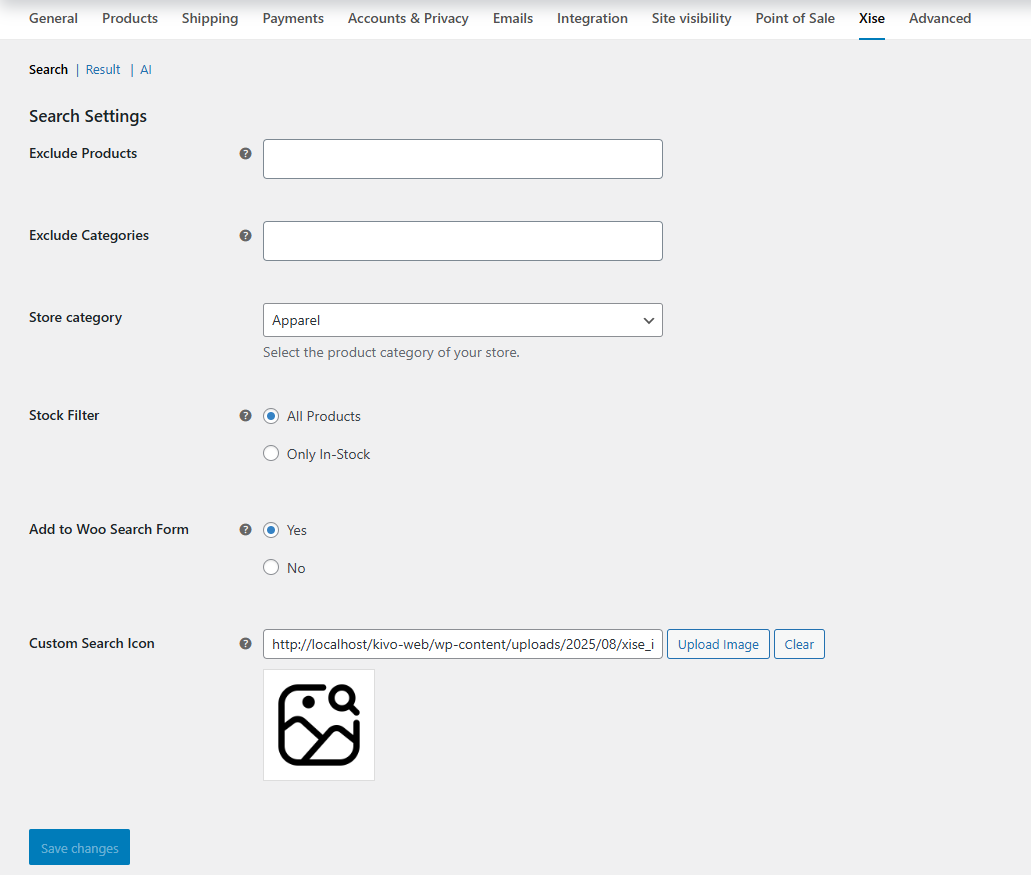
Search Settings #
These settings control the behavior of the search button and what is included or excluded from the search.
Exclude Products: Use this multi-select dropdown to choose specific products that you want to prevent from being included in the AI image search results.
Exclude Categories: Similar to products, this multi-select dropdown allows you to exclude entire product categories from the AI search.
Store Category: This dropdown specifies the general product category of your store, which helps the AI model provide more accurate results. Options include
General,Apparel,Toys,Packaged Goods, andHomegoods.Stock Filter: This setting determines whether the search should consider all products or only those currently in stock.
All Products: The search will include both in-stock and out-of-stock items.
Only In-Stock: The search will be limited to products that have stock available.
Add to Woo Search Form: This radio button allows you to integrate the image search button directly into the default WooCommerce search form.
Yes: The image search button will be added to your site’s main search bar.
No: The image search button will not be added automatically.
Custom Search Icon: This field allows you to upload a custom icon for the image search button. You can upload an image file (SVG is recommended) to customize the look of the search button.
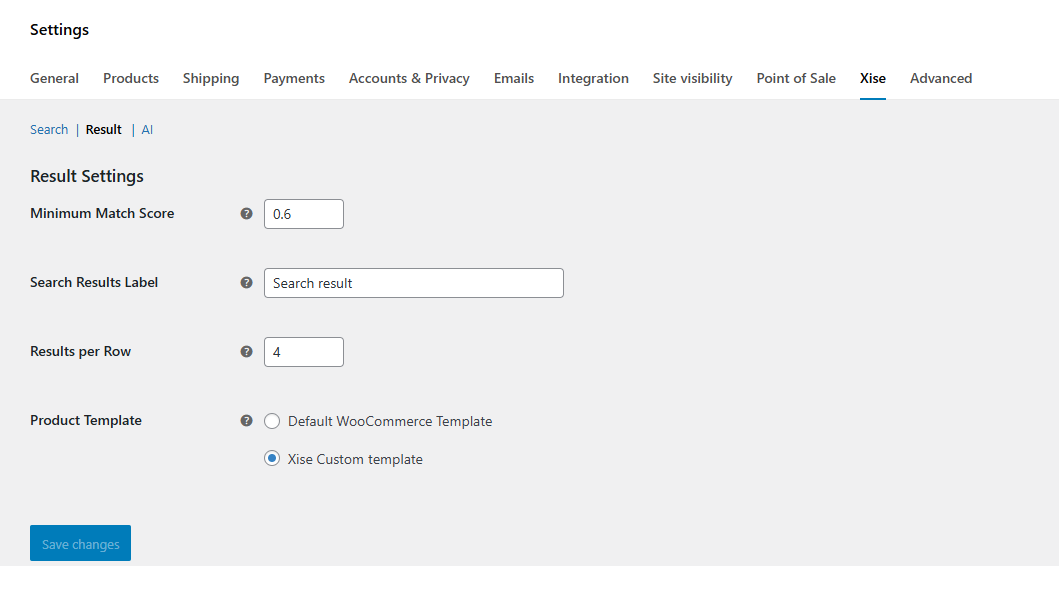
Result Settings #
These settings control how the search results are displayed to the user.
Minimum Match Score: This is a numerical value between 0.0 and 1.0. Products with an AI match score below this threshold will not be shown in the results. A higher value means the results will be more precise but potentially fewer.
Search Results Label: The text entered here will be used as the heading for the search results section on your site. The default value is “Search result”.
Results per Row: This number determines how many products are displayed horizontally in a single row within the search results.
Product Template: This setting allows you to choose the template used to display products in the search results.
Default WooCommerce Template: Uses the standard WooCommerce product layout.
Xise Custom Template: Uses a custom template provided by the Xise plugin for a different display style.