
The Google Cloud Vision API allows developers to understand the content of an image by encapsulating powerful machine learning models. This guide will walk you through the complete process of enabling and using the Vision API, from initial project setup to running a basic application.
Step 1: Set up Your Google Cloud Project #
Every Google Cloud resource, including the Vision API, belongs to a project. A project is a container for your resources, and it’s where you manage billing, permissions, and API access.
Go to the Google Cloud Console: Navigate to the Google Cloud Console.
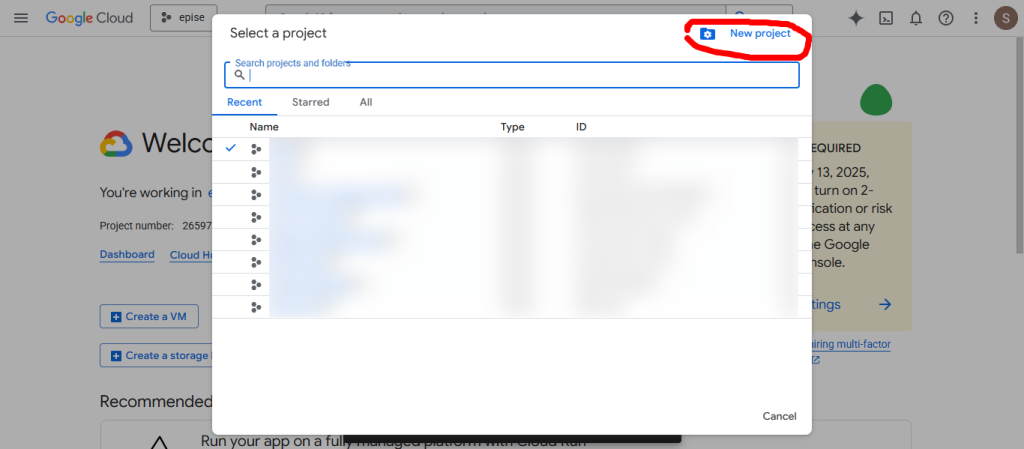
Create a New Project: From the project selector at the top of the page, click New Project. If you have already created project, you can use existing one as well.
Name your project: Give your project a descriptive name and click Create. Take note of the
Project ID, as you will need it later.
Step 2: Enable Billing #
Even for services with a free tier, you must have a billing account enabled for your project. This is a safeguard against unexpected costs if your usage exceeds the free limits.
Navigate to the Billing section: In the navigation menu (the three horizontal lines in the top-left corner), select Billing.
Link to a Billing Account: If you don’t have one, you’ll be prompted to create one. Follow the steps to provide your payment information. If you already have an account, make sure it is linked to your new project by clicking My projects and linking the correct billing account.
Step 3: Enable the Vision API for Your Project #
With a project and billing set up, you now need to enable the Vision API specifically for that project.
Go to the APIs & Services Dashboard: In the navigation menu, select APIs & Services > Dashboard.
Enable the API: Click the + ENABLE APIS AND SERVICES button at the top of the page.
Search for “Cloud Vision API”: Type “Cloud Vision API” in the search bar and select it from the results.
Click Enable: Click the Enable button to activate the API for your project.
Step 4: Create a Service Account and Generate a Key #
A service account is a special type of Google account used by applications to make authorized API calls. You will create a service account and download a JSON key file, which your application will use to authenticate with the Vision API.
Go to the Service Accounts page: In the navigation menu, select IAM & Admin > Service Accounts.
Create a Service Account: Click + CREATE SERVICE ACCOUNT.
Enter details: Provide a name and description for your service account and click Create and continue.
Grant access: In the “Grant this service account access to project” step, you need to assign the correct role. Initially, for testing purpose, you can assign role “editor” and later you can change for more restricted role. This gives the service account the necessary permissions to use the Vision API. Click Continue.
Finish creation: You can skip the final step about granting access to other users for now. Click Done.
Generate a new key: On the Service Accounts page, click the email address of the service account you just created.
Create a JSON key: Navigate to the Keys tab, click Add Key > Create new key. Select JSON and click Create. A JSON file will automatically download to your computer. Keep this file secure and do not share it publicly.
Step 5: get the Google Vision API Key #
In the Google Cloud Console, navigate to APIs & Services > Credentials.
Click + CREATE CREDENTIALS and select API key.
- Save the API key
This completes the Google Cloud Vision api related settings. Now, this information will be used for Xise AI related settings. Refer Xise AI related settings for more details.


